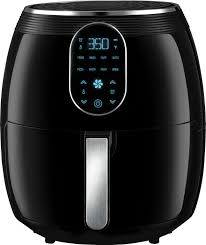
Ninja Air Fryer Cleaning Process: Step-by-Step Guide
Keeping your Ninja Air Fryer clean ensures it operates efficiently, prolongs its lifespan, and safeguards the flavor of your foods. Cleaning might seem daunting, but with the following step-by-step guide, you’ll have your appliance looking and operating like new in no time!

1. Ensure Safety First
- Unplug: Before cleaning, always unplug the air fryer and ensure it’s completely cool to avoid burns.
2. Remove Detachable Parts
- Empty the Air Fryer: Remove any leftover food particles.
- Detach the Basket: Take out the frying basket, crisper plate, and any other removable components.
3. Start with the Main Unit
- Wipe Down: Using a damp cloth, wipe the exterior of the air fryer. Ensure the cloth isn’t dripping wet to prevent water from entering the air fryer’s vents or system.
- Clean the Interior: Use a soft sponge or cloth dampened with a mild detergent to clean the inside. Wipe down the heating element with care, ensuring no debris is left behind.
4. Wash Removable Parts
- Soaking: If there are stubborn food residues on the basket or crisper plate, let them soak in warm soapy water for about 10 minutes.
- Hand Wash: Using a soft sponge and mild dish soap, scrub the frying basket, crisper plate, and any other removable components. Ensure all food residues are completely removed.
- Dishwasher Option: If you prefer, and if the manufacturer’s instructions permit, you can place the removable components in the dishwasher.
5. Addressing the Heating Element
- Brush Off Debris: Use a soft brush (an unused toothbrush works great) to gently brush off any food debris or residues from the heating element. Be gentle to avoid any damage.
- Wipe Down: Dampen a cloth with warm water and gently wipe the heating element. Avoid using any detergents directly on the element.
6. Allow Parts to Dry
- Air Dry: Place all washed components on a drying rack or on a dry towel to air dry completely. This is crucial to prevent any mold or mildew formation.
- Wipe Down: If you’re in a hurry, you can also pat down the parts using a dry cloth or paper towel to speed up the drying process.
7. Reassemble the Air Fryer
- Once all parts are completely dry, carefully reassemble the Ninja Air Fryer, placing the crisper plate and basket back in their respective positions.
8. Store in a Safe Place

- Store your Ninja Air Fryer in a cool, dry place, preferably with a cover to prevent dust accumulation when not in use.
Final Tips:
- Frequency: For the best results and hygiene, clean your air fryer after each use.
- Avoid Harsh Chemicals: Stay away from abrasive pads or harsh cleaning agents to keep the non-stick surface intact and maintain the longevity of your appliance.
- Consult the Manual: Always refer to the user manual provided with your Ninja Air Fryer for any specific cleaning instructions or precautions.
With regular and thorough cleaning, your Ninja Air Fryer will not only look great but will also function efficiently, ensuring crispy and delicious results every time. Happy frying
One response to “Ninja Air fryer cleaning process step by step”
Best Articles
LikeLike